
INHOUDSOPGAWE:
- Stap 1: Instalando Sonoff T1 VS
- Stap 2: Baixando Aplicativo
- Stap 3: Cadastro No Aplicativo
- Stap 4: Hoof van Tela
- Stap 5: Conectando O Sonoff Com O EWeLink
- Stap 6: Lys van die dispositivos
- Stap 7: Cadastro De Controle
- Stap 8: Configurações Do Dispositivo
- Stap 9: Kompartimenteer
- Stap 10: Agenda
- Stap 11: Timer
- Stap 12: Cenas
- Stap 13: Condição
- Stap 14: Prestasie
- Stap 15: Funcionamento Da Cena
- Outeur John Day day@howwhatproduce.com.
- Public 2024-01-30 07:25.
- Laas verander 2025-01-23 12:53.

O Sonoff kan 'n produk produseer vir 'n outomatiese residensiële en voormalige huis.
Ons onderbreek Sonoff T1 VS se aparte posisies kan 90-250V AC, 'n 2A -aansluiting vir 'n 2.4GHz -ontvanger, met 'n ontvangs van 315Mhz (met 'n model in die VS en 433Mhz as model) UE) e com aplicativo próprio.
Dit is moontlik met Amazon Alexa, Google Assistant en Google Nest.
Hierdie programme kan ons ook maklik omskryf as 'n eenvoudige simbool, maar dit kan ook interaksies met die sonoff adicionados posteriormente gee.
Assim podendo transformar qualquer casa em uma Smart Home !!
Materiais:
- Sonoff T1 VS.
- Fios Paralelo.
- Ferramentas (chaves philips, alicate de corte e ens …).
- Gebruik Android of IOS.
Nesse caso usamos plugs machos e fêmeas para facilitar a explicação.
Stap 1: Instalando Sonoff T1 VS


Para instalar o Sonoff T1 US existe uma entrada para conectar à rede elétrica indicada no aparelho N (Neutro) e L (Fase).
Die embleem kan vir L1, L2 en L3 gesê word.
in - N (Neutro)
in - L (Fase)
uit - L1
uit - L2
uit - L3
Stap 2: Baixando Aplicativo

Vir meer inligting, kan u 'n eWeLink -program by die Play Store of die app -winkel aflaai.
Stap 3: Cadastro No Aplicativo

Ons kan uiteindelik 'n installasie, abra o aplicativo. Geen inferieure kant nie, geen 'Registra' nie, maar ook nie 'n aanmelding nie.
Stap 4: Hoof van Tela

Aflaai die fazer om aan te meld, maar ons kan ook 'n lid van die hoofadres van ons administratiewe administrasie gebruik.
Stap 5: Conectando O Sonoff Com O EWeLink


Geen Sonoff -druk vir 7 segmente of primêre installasies nie, of 'n gewone son of LED vir 3 keer en herhaaldelik.
Klik nie op 'n app nie (klik op die hoof), klik op '+' om 'n ander adres te gebruik, en klik op 'Quick Paring'.
U kan ook 'n aansoek om SSID en 'n WI-FI-skakel gebruik, en klik op "Volgende". Verder, of aplicativo irá procurar of Sonoff.
Ons kan ook 'n aankondiging van Sonoff, of aplicativo irá solicitar um nome para o dispositivo (Coloque algo sugestivo, como: Luzes do quarto, Luzes banheiro, Luzes_Varanda …) verkry van "Sonoff T1 US".
Adicionado com successesso!
Kliek em entendi.
Stap 6: Lys van die dispositivos


U kan ook die hoofkomponent van die kolokou bestel.
Ons kan ook die e -posadres van SmartPhone gebruik, maar u kan ook nie (On) ou (OFF) klik nie.
E para adicionar mais dispositivos basta clicar novamente em "+" e repetir o Step anterior.
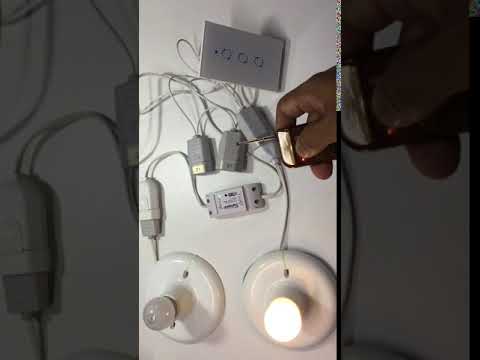
Stap 7: Cadastro De Controle


Para cadastrar or control RF é needsario cadastrar individualmente cada saida do Sonoff T1 US. Die druk op die CH1 deur 5 segmente kan vir 'n goeie tyd gebruik word.
Para limpar en codificação: Pressione e segure o botão de toque de CH1 até ouvir dois bipes. Persoonlike kwalifikasie sonder RF -afstandsbediening. het 'n goeie oplossing vir 'n limousin.
Caso não tenha conseguiu emparelhar, por favour, tente limpar primeiro.
Stap 8: Configurações Do Dispositivo


Klik hier om nie 'n aparte funksie te kry nie.
Geen sentro da tela está o botão de On/Off onde ainda pode-se ligar ou desligara luz.
Daar is geen inferior naam nie, maar ons kan nie meer 'n kombinasie, 'n agenda of 'n tydopnemer hê nie.
Stap 9: Kompartimenteer


Ons bied 'n groot moontlikheid om toestemming te gee vir die gebruik van 'n ander stelsel.
U kan ook 'n e-posadres of 'n e-posadres of 'n e-posadres oor Sonoff stuur.
Selecione as permissões que desejar e caso queira faça uma anotação. Dit is ook 'n goeie idee om 'Compartilhar' te klik.
O APP do celular que foi compartilhado recebera uma mensagem informando sobre o compartilhamento, basta "Confirmar" e o Sonoff será adicionado by tela principal to aparelho, podendo agora ser utilizado.
Stap 10: Agenda


Gebruik 'n Agenda para criar events, vir meer inligting oor ons agenda.
Vir meer inligting, klik op "+ novo" of 'n aparte teks: "Mês", "Dia", "Hora" en "Min". Onde pode-se escolher quando o evento irá acontecer. Ons kan ook 'Ano', 'Repetir' en 'Estado' gebruik.
Eno: Ons kan ook 'n gebeurtenis sien.
Herhaal: Ons kan hierdie gebeurtenis as 'n gebeurtenis gebruik.
Stad: Ligado ou Desligado.
Klik op die "Salvar" of agendamento irá ser listado, podendo adicionar outros posteriormente.
Stap 11: Timer


Timer é um temporizador que define em quanto tempo of Sonoff irá acionar. Após clicar em "Timer" aparecerá a tela onde os temporizadores estarão listados.
Para adicionar um Timer basta clicar em "+ Adicionar um Timer", of 'n aparte nommer wat ons kan kies, kan ons 'n paar minute inskakel.
Ons kan ook 'n tydopname vir 'n tydskrif gebruik, maar as 'n nuwe kliek kan u dit nie dadelik gebruik nie.
Stap 12: Cenas


As Cenas são muito uteis fora gerar comandos simples para ações mais complexas.
Nesse caso será utilizado 1 Sonoff T1 US e 1 Sonoff Basic para acionamento remoto.
Ons kan ook 'n kliek op "Cenas", nie 'n minderwaardige naam nie, maar ook 'n ander naam as 'n "Adicionar Cena".
Ons kan ook meer van die plaaslike, plaaslike administratiewe funksies sien: gebiede van prestasie.
Stap 13: Condição


Klik op "+Voeg toe" vir 'n aparte lys van beskikbare voorwaardes.
Selecione o dispositivo que deseja que seja o acionador da cena e o estado em que ele deve estar para acionar a cena.
Klik op "ok" om 'n kondisie vir 'n sua cena funcionar está cadastrada.
Stap 14: Prestasie


Klik op "+Voeg" toe om prestasie te gebruik en 'n lys van beskikbare posisies te verstrek.
Kies 'n opsie om dit te bevestig en klik op "OK".
Daar is 'n aantal optredes op die lys.
Vir meer inligting oor die herhaling van die proses, word die term "OK" as 'n ander lys van die lys.
Stap 15: Funcionamento Da Cena

Kom ons kan CH1 doen met Sonoff T1 ons kan ook 'n funksie hê, of ons kan 'n nuwe funksie of 'n funksie vir die sonof basiese logo hê.
Aanbeveel:
Maak 'n DIY Sonoff Smart Switch Gebruik Android App: 11 stappe

Maak 'n DIY Sonoff Smart Switch Gebruik Android -app: Wat is Sonoff? Sonoff is 'n slim skakelaar vir Smart Home wat deur ITEAD ontwikkel is. Een van die mees buigsame en goedkoopste toestelle uit die reeks is Sonoff Basic en Sonoff mini. Dit is Wi-Fi-skakelaars wat gebaseer is op 'n uitstekende chip, ESP8266/E
Hoe om 'n slim rolgordyn met SONOFF -slimskakelaars te doen ?: 14 stappe

Hoe om 'n slim rolgordyn met 'n SONOFF -slimskakelaar te maak en trek dit in die aand af? Ek is in elk geval
Hoe om die video te voltooi: 4 stappe

In die vorm van 'n paar wysigings: 'n Hoë les kan 'n groot aantal artikels bevat wat op YouTube, Facebook, Instagram, ens. Aangewend kan word. esta guía: MÓVILaplicación para editar
Voltooi die taak: die installering van 'n USB -sleutelbord in 'n OLPC XO -skootrekenaar, Fase II: 6 stappe

Voltooi die taak: die installering van 'n USB-sleutelbord in 'n OLPC XO-skootrekenaar, fase II: vir 'n man wat die grootste deel van sy lewe deurgebring het met sy vingers aan die huisry, het hierdie USB-sleutelbord wat ek regtig kan aanraak, bygevoeg groot verskil in die bruikbaarheid van die XO. Dit is " fase II " - sit die kabel vas
Hoe om opdragprompt (voltooi) te begin: 6 stappe
 te begin: 6 stappe")
Hoe om opdragprompt (voltooi) te begin: ek weet dat instruksies oor hoe om dit te doen reeds daar is. Moenie dit vir my sê nie, asseblief. Ek het my redes hiervoor. Al die instruksies wat ek daar gesien het oor hoe om die opdragprompt oop te maak, wys u basies net een manier om dit te doen. Ek