
INHOUDSOPGAWE:
- Outeur John Day day@howwhatproduce.com.
- Public 2024-01-30 07:27.
- Laas verander 2025-01-23 12:53.

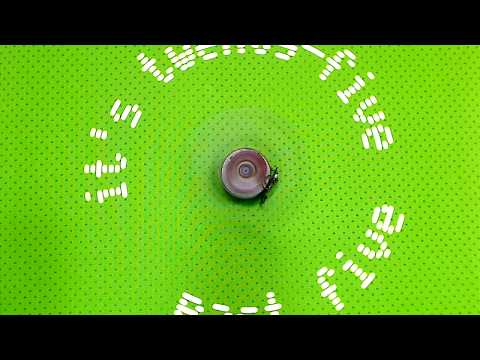
Ek het hierdie klein dingetjie vir die klokwedstryd gemaak. Die basiese is my vorige POV wat hier gepubliseer is.
Stap 1: materiaal:


3 -5 V DC motor, Arduino pro mini 5V 16Mhz, RTC module met rugsteunbattery, IR LED en fototransistor, LED's, weerstande, koperdraad, 'n stuk koaksiale kabel, 'n stuk afval PCB.
Stap 2: Doen dit net …


Hierdie gadget gebaseer op my vorige projek wat goed beskryf word. Ek plaas foto's hier omdat ek dink een prentjie vertel meer as honderde woorde.
Stap 3: Die skerm


Stap 4: RTC -module


Stap 5: Foto -elemente


Stap 6: Spoel
Aanbeveel:
Budget Arduino RGB Word Clock !: 7 stappe (met foto's)
")
Budget Arduino RGB Word Clock !: Hallo almal, hier is my gids oor hoe om u eie eenvoudige te maak & goedkoop woordklok! Gereedskap wat u benodig vir hierdie projek Soldeerbout & Soldeerdrade (verkieslik ten minste 3 verskillende kleure) 3D -drukker (of toegang tot een, u kan ook
Buigsame boekwyser wat verander kan word, kan verander word: 6 stappe

Buigsame boek wat verander kan word: verander u gunsteling papierboekmerk in 'n veranderlike boek met slegs 'n paar maklike stappe. om 'n boek opsy te sit as dinge gaan
Arduino RGB Matrix Word Clock: 6 stappe

Arduino RGB Matrix Word Clock: Vergeet getalle, die RGB LED Word Clock vertoon die tyd as teks! In plaas van twee hande of 'n digitale skerm, toon die Word Clock die huidige tyd as woorde in helder LED -lig met behulp van 'n standaard 8x8 LED -matriks. Byvoorbeeld, as die tyd 10:50 was
Arduino Word Clock Mini: 20 stappe (met foto's)
")
Arduino Word Clock Mini: Arduino Word Clock Mini- Anniversary Clock Relatief maklik om Word Clock te bou met 'n Arduino Nano en vier MAX7219 32mm Dot Matrix Display Modules Keuse van style, prentraam of Perspex-kubus met verskillende basisopsies. Spesifikasies Mini Arduino Word Clo
Arduino Wireless Power POV -skerm: 6 stappe (met foto's)
")
Arduino Wireless Power POV Display: Toe ek hierdie klein toestel die eerste keer ontmoet, het ek dit dadelik geniet. Ek het besluit om my eie POV te maak. Ek het baie video's gekyk en 'n paar hoofprobleme herken. Die kragvoorsiening van die mikrobeheerder was die grootste. Draai battery of gly kommutaat